enable
config t
class-map inspection_default
match default-inspection-traffic
!
policy-map global_policy
class inspection_default
inspect pptp
!
service-policy global_policy global
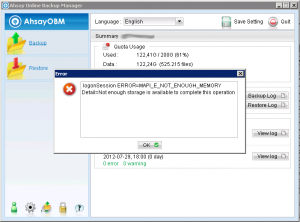
logonSession ERROR= MAPI_E_NOT_ENOUGH_MEMORY Detail= Not enough storage is available to complete this operation
Your receive the message: “logonSession ERROR= MAPI_E_NOT_ENOUGH_MEMORY Detail= Not enough storage is available to complete this operation” when you try to start Ahsay Maillevel backup.
Solution:
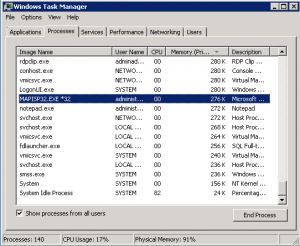
Look for the proccess “MAPISP32.EXE” in the task manager and kill it, then run my Cleanup Ahsay script found Here, and you are good to go.
XP Mode application not showing in start menu
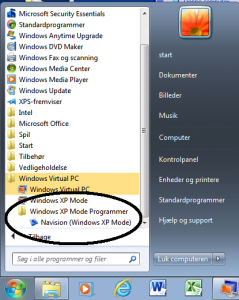
If your have installed XP Mode, and have installed some applications inside the XP mode and they dont show up in the windows 7 start menu, this mini guide may can help you:
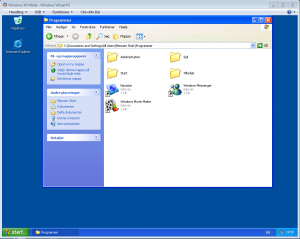
Copy the shortcut to the application to this folder (inside the XP Mode):
English XP mode: C:\Documents and Settings\All Users\Menuen Start\Program files Danish XP mode C:\Documents and Settings\All Users\Menuen Start\Programmer
in this guide I have installed Navision inside XP mode
telnet smtp commands
Here is a mini how to use telnet to send email / or use it to test the smtp server
1. Type telnet [mailserver ip og hostname] [Port]
telnet mail.domain.com 25
2. Type helo [your hostname]
Helo mail.mymailserver.com
3. Type mail from: [a valid email address]
MAIL FROM: mail@domain.com
4. Type RCPT TO: [Receive emailaddress]
RCPT TO: testuser@domain.com
5. Type DATA
DATA
6. Type the message of the email
This is a test email
7. On a new line type .
.
Configure Cisco AP 1131/1141
How to configure Cisco Ap 1131 or 1141
Default Login
Login: Cisco
Password: Cisco
Enable password Cisco
Telnet to the accesspoint (default it get a dhcp address)
enable Config t Hostname Cisco1 dot11 ssid <SSID name> authentication open authentication key-management wpa version 2 wpa-psk ascii 0 <WPA key/preeshared key> guest-mode interface dot11radio0 encryption mode ciphers aes-ccm ssid <SSID name> no shutdown end config t username Cisco password 0 <new password> enable secret 0 <new password> end copy run start
Udvidelse af TDC mailboks
Her er en simpel guide til hvordan du udvider din TDC mailboks:
Gå til www.tdc.dk
Vælg login
Vælg Privat (eller Erhverv)
Vælg opret tdc login
Opret ny TDC bruger ved at udfyld felterne
log ind på mail.dk
Vælg “Tilknyt din TDC-mail til dit TDC Login”
Log derefter ind på mail.dk med dit nye login
Tryk på udvid mailboks ude til venstre
Finding the process that is using a certain port
Get a full list of binded ports
netstat -nao
search for a specific port
netstat -nao | findstr 0.0:<Port Number>
Find the aplication behing the PID (Process ID)
tasklist | findstr <PID ID>
Force Outlook Autodiscover to use SRV Record
How to force Outlook Autodiscover to only use SRV for autodiscovery
create this batch file and run it:
Outlook 2007:
Windows Registry Editor Version 5.00 [HKEY_CURRENT_USER\Software\Microsoft\Office\12.0\Outlook\AutoDiscover] "ExcludeHttpRedirect"=dword:00000001 "ExcludeHttpsAutoDiscoverDomain"=dword:00000001 "ExcludeHttpsRootDomain"=dword:00000001 "ExcludeScpLookup"=dword:00000001
Outlook 2010:
Windows Registry Editor Version 5.00 [HKEY_CURRENT_USER\Software\Microsoft\Office\14.0\Outlook\AutoDiscover] "ExcludeHttpRedirect"=dword:00000001 "ExcludeHttpsAutoDiscoverDomain"=dword:00000001 "ExcludeHttpsRootDomain"=dword:00000001 "ExcludeScpLookup"=dword:00000001
Using SRV Record for Exchange 2007/2010 Autodiscover
You can use a SRV record for exchange Autodiscover services, just create a srv record named:
Service: _autodiscover Protocol: _tcp Port Number: 443 Host: [Hostname of the server]
Eg.
Host: _autodiscover._tcp.kasperk.it, Port 443, host: mail.kasperk.it
source: http://support.microsoft.com/kb/940881
You can test the configuration here: https://www.testexchangeconnectivity.com/ choosing Outlook Autodiscover
Cisco ASA 8.4 Port Forwarding (Pat/Nat) ASDM
Cisco ASA 8.4 Port Forwarding Port 25 with ASA 8.4 with ASDM
Step 1. Open ASDM and jumb to Configuration mode:
Step 2. Click Add, choose Network Object… (Found in the Right side panel)
Step 3.
Ip address: type the Inside ipaddress of the pc/server
check Add Automatic Address Translation Rules
Type: static
Translated Addr: choose the WAN interface (default it is outside)
Click Advanced
Step 4.
Souce Interface: Choose the interface which the pc/server is connected
Destination Interface: Choose the WAN interface (default it is outside)
Protocol: tcp
Real Port and Mapped Port: Type smtp og the port nummer your want to open
Step 5. Create a Access Rule, click Add, and choose Add Access Rule…
Step 6.
Interface: Outsite
Action: Permit
Source: Any
Destination: The object we just created